This guide will specifically focus on KoboldAI United for venus ai, however the same steps should work for sites such as VenusChub,Harpy chat and other, similar AI chatting websites.
What is Venus AI?
VenusAI is an interactive platform where users can engage with a diverse range of AI-generated characters across various categories, including anime, gaming, and more. Whether you’re looking for SFW or NSFW content, VenusAI offers a plethora of characters to choose from.
Kobold AI API URL is used to interact with the Kobold AI platform. This platform offers a range of powerful tools and services for developers and businesses, including advanced natural language processing and machine learning capabilities.
To access the Kobold AI API, developers need to make HTTP requests to a specific URL endpoint. The Kobold AI API URL serves as the gateway for communication between the client application and the AI platform. By sending requests to this URL, developers can interact with Kobold AI and access its various functionalities.
The Kobold AI API URL follows a standardized format that typically includes the domain name or IP address of the Kobold AI server, along with the specific endpoint for the desired API resource. For example, a typical Kobold AI API URL might look like “https://api.koboldai.com/v1/analyze”.
Why should you Use Kobold api url on Venus AI?
To successfully chat with Venus AI, you need to configure APIs, specifically the OpenAI API and the Kobold AI API. In actual use, setting up the OpenAI API is straightforward and it comes with a $5 free allowance. However, if it’s used in regions not supported by OpenAI, this can lead to the OpenAI API account being suspended, rendering it impossible to use ChatGPT. Compared to the OpenAI API, the Kobold AI API is safe and reliable. The only difference is that it’s a bit more complex to set up, but it’s quite simple if you follow the steps in this article. For the sake of account security and stable usage, we recommend using the Kobold AI API.
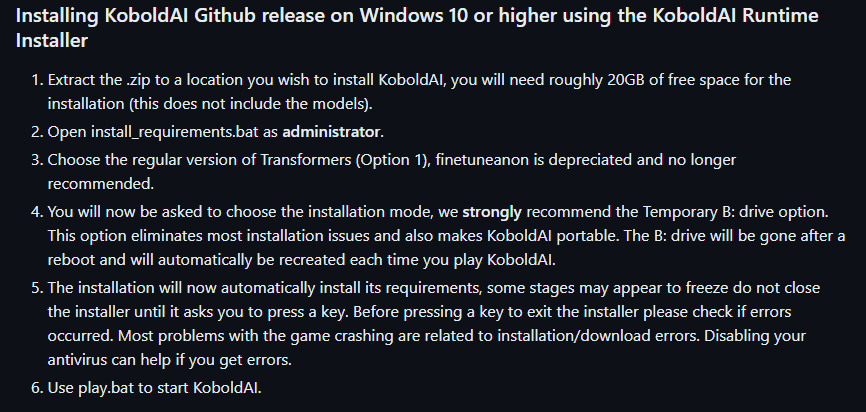
Step 2:Run install_requirements with administrator privileges.
Follow this step by step. It is also provided on the github site. Do not forget to run install_requirements as Administrator. It is an essential step, as KoboldAI will need access to important parts of your system to run.
Do not close the installer until it asks you to press a key, or you will mess up the process.
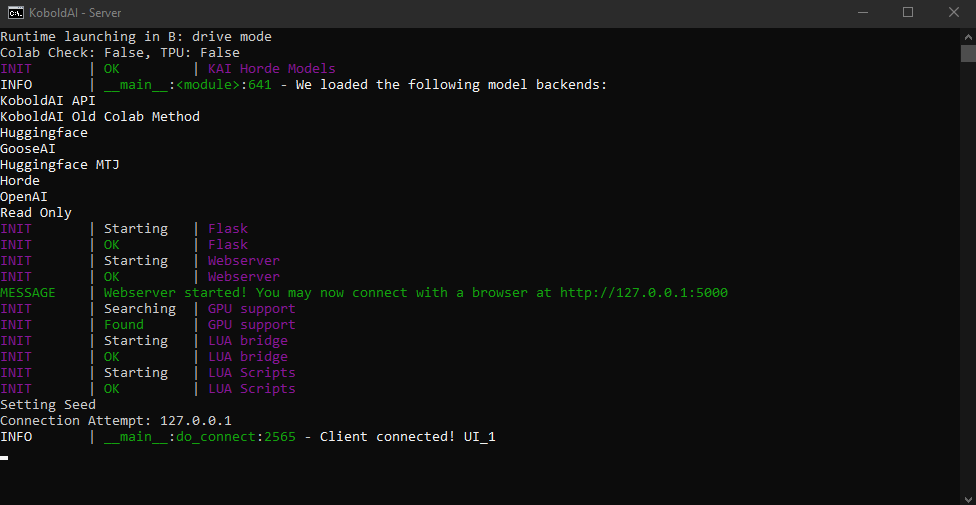
Step 3:Run KoboldAI on Windows.
Select the windowsbatch file “play” and open KoboldAI. Assuming everything went right, it should look something like this:
Step 4:Verify the installation environment for Pygmalion 6B.
A page should have automatically opened on your browser. It is set to “Read Only,” meaning you can not use it to chat right now. To fix this, we will need to install Pygmalion 6B. This can be found following these steps:
Press AI
Chat Models
Pygmalion 6B
DO NOT INSTALL PYGMALION 6B YET, CHECK YOUR GPU FIRST, STEP 5
It should look something like this:
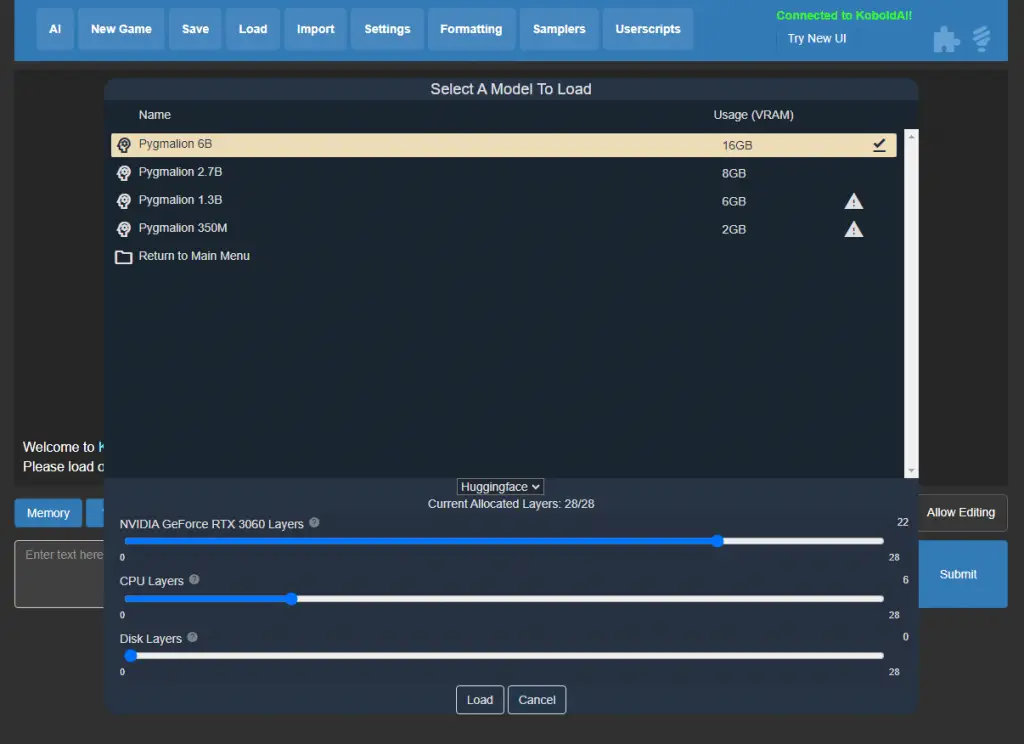
Step 5:Configure disk partition for Pygmalion 6B.
This step is equally important. Note the ‘layers’ that you have to allocate. Pygmalion 6B uses 16GB Vram, but my GPU does not have 16GB Vram available. This is how I know I need to allocate some to my CPU. Never allocate any to your disk, leave it at zero.
If you do not know how to check your Vram, have no fear, neither did I. Follow these steps:
On the Windows search bar, type Settings.
Click Display.
Click Advanced Display.
Click Display Adapter Properties for Display 1.
Next to Dedicated Video Memory, you’ll be told how much VRAM your graphics card has.
If this does not work for you/you cannot find it, follow these steps instead:
On the Windows search bar, type dxdiag.
Wait for it to open then click either Display 1 or Display 2 to view your other GPU.
Under Display Memory, you’ll be able to see how much dedicated VRAM the GPU has.
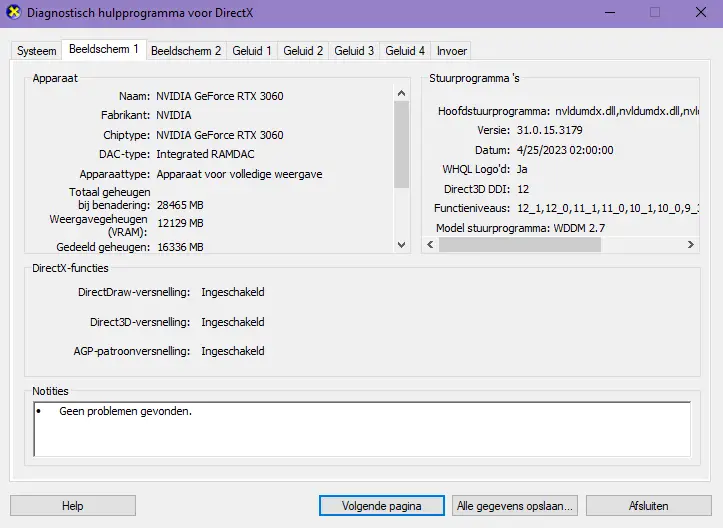
You should see something like this:
Now mine is Dutch, but you can see the Vram. I have 12129 MB, which is 12 GB, so I therefore know I do not have enough Vram to put everything on my GPU. That is why I moved some to my CPU. I put 22 layers on my GPU and 6 on my CPU, and this is what worked for me. However, you might have to figure out what works for you.
This is definitely not easy to run for your PC, if you do not have a good PC, do not do this. KoboldAI offers services to ‘rent’ a GPU, or you can ask a friend to run a server.
Step 6:Install Pygmalion 6B
Assuming you allocated all your layers, wait for Pygmalion 6B to be implemented. This can take a long time, but your KoboldAI window should show the progress. After you are done waiting, once again do not close the window before it’s done, the browser’s info should have changed from Read Only to something like this:
Remember, you need to reload Pygmalion every time you start the server up. Without it, the characters will not be able to generate a response.
Step 7:Find KoboldAI api Url
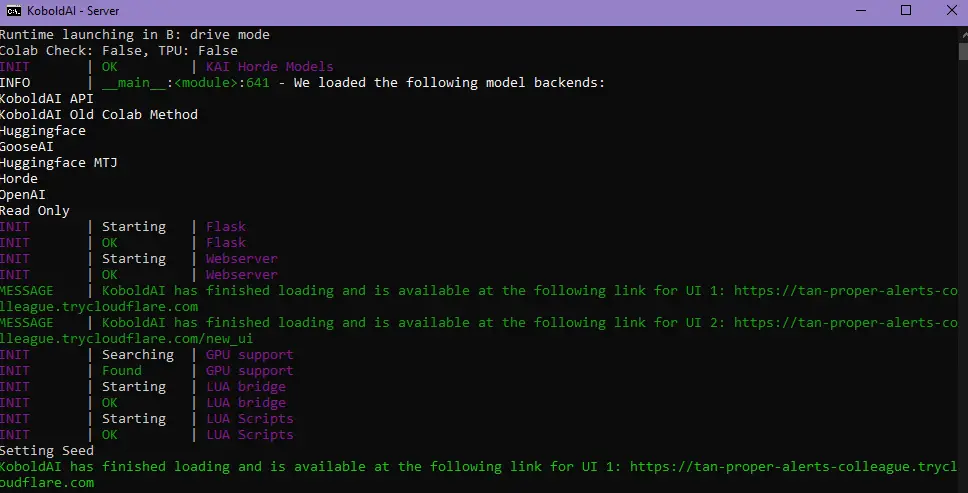
Close down KoboldAI’s window. I personally prefer to keep the browser running to see if everything is connected and right. It is time to start up the batchfile “remote-play.” This is where you find the link that you put into JanitorAI.
It should look something like this. Note the green lines, that’s where the link is in. I use UI 1. The link is randomly generated every time upon start-up.
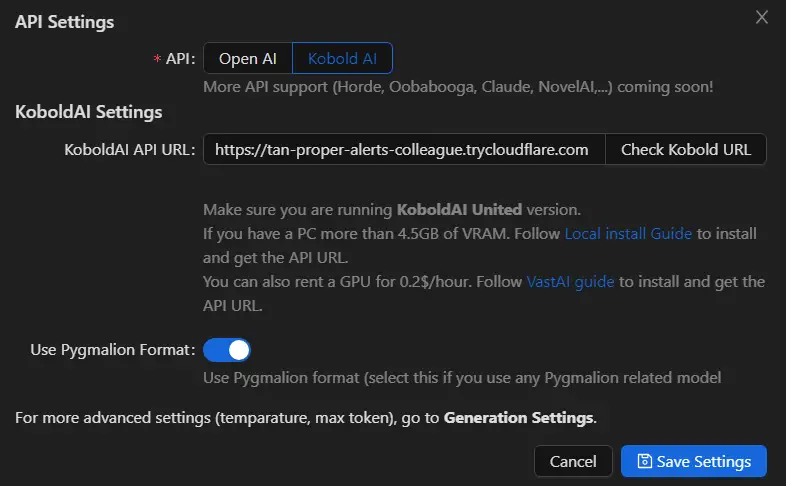
Step 8:Paste KoboldAI API URL to Venus AI api box
Type the link into the KoboldAI API URL box, and press save settings.
Step 9:Start chat with Venus AI
You should be connected! Have fun typing away, you heathen!